Grey County Master Gardeners
Starting Plants from Seed
Sounds like a lot of work to me!
Not really, and seed propagation is a very cost effective way to obtain a large number of plants or plants that you cannot purchase locally. Look first for locally sourced seeds as these will be better adapted to your region, and therefore more vigorous, hardy and more resistant to stress, insects and diseases. It can also be very satisfying and a fun thing to do.
Where can I find a good selection?
Seeds can be obtained from catalogues, nurseries, supermarkets, your own saved seeds, friends and seed exchanges such as a Seedy Saturday event. Choose seeds of perennial plants that suit your climate (hardiness zone) unless you plan to keep them as a houseplant or use as an annual. If you must have seeds from your neighbour’s prized plant, please no fence hopping; requesting some seeds is a better idea and they will most likely be happy to share.
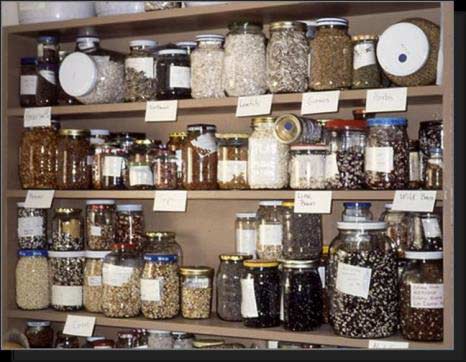
Where should I keep my leftover seeds? When storing saved seeds it is best to use small metal cans with lids, screw top glass or plastic jars, and envelopes stored in plastic bags. Make sure to label the contents with the variety name and any cultural information available. Store your seeds in a dry, cool area. The refrigerator is a great option keeping the seeds at a constant 4 degrees.
Are old seeds still good, or do I have to buy
new ones each year?
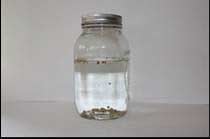
If the seeds you have are older than a year, the viability of the seed may have decreased. A test can be done just prior to sowing the seeds. Fill a jar or other suitable container with water, leaving room at the top. Place the seeds you want to test in the water, replace the lid and shake the contents a few times, then stand the container up and let the contents settle. The seeds that fall to the bottom are viable seeds, while the ones floating on top are hollow. If the seeds that you have done the viability test on do not require being soaked for scarification, they will need to be sown immediately in the media. Seeds may also be started between two damp paper towels, once the seed’s primary root (radical) appears, the seeds need to be sown in the growing medium.
Do I need to do anything special to get them to sprout?
To germinate seeds we need to duplicate the natural environment (cultural requirements) that the seed would have germinated at in the wild. Seed preparations, growing medium, seed depth, light, shade, oxygen and moisture are all factors in successful seed germination. While the majority of seeds can be started by planting in the soil-less medium or directly in the garden, some seeds require scarification or stratification to break dormancy.
Scarification removes or abrades the hard outer coat of the seed, allowing moisture to penetrate and hydrate the seed to start germination. Methods include:
- Placing seeds between two sheets of medium grit sandpaper and rolling gently to abrade the seed coat. Baptisia (False indigo), Asparagus and Ipomoea (Morning Glory) germinate well with this method.
- Nicking the seed coat with a pocket knife. Lupin seeds benefit from this treatment.
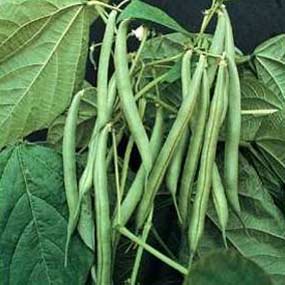
- Hot water scarification, which is placing seeds in a cup & covering them with hot (170-200 degrees) but not boiling water. This method is used for Peas, Beans, Nasturtium and Parsley.
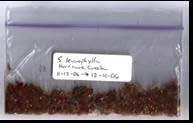
Stratification is the simulation of natural winter conditions, a dormant cold stage required for germination by temperate seeds including such native plants as Asclepias incarnate (Swamp Milkweed) and Podophyllum peltatum (Mayapple). Methods include:
- Plant seeds in a pot and bury it for the winter in a sheltered spot in the flower bed. When you see the seedlings sprouting, transplant them to their final home.
- Place seeds in a plastic bag with moistened medium and refrigerate for the required time, usually two months.
Do I need to buy special containers?
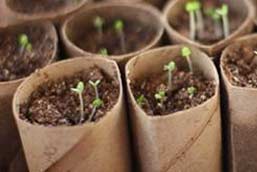
Think outside of the regular seed starting flats, and consider recycling empty containers. Any container can be used as long as there are drainage holes in the bottom, or the container is a material that allows drainage holes to be added. Used yogurt, berry, sour crème and lettuce containers work well. Some containers are not suitable for seed starting. Egg cartons are too small, peat pots wick moisture away from the growing medium, and peat pellets are too confining, requiring labour intensive re-potting. Previously used pots or recycled containers should be cleaned with 10 parts water to one part bleach solution to kill any bacteria and fungal spores that can cause diseases such as damping-off. If your plants develop damping-off, all the plant material including the media needs to be thrown out.
What’s the dirt on dirt?
A soil-less mix or seed starter will give your seeds the best chance for success. They do not contain weed seeds, soil borne disease or fungus spores. They will be a light, airy soil able to absorb and hold moisture but also well drained. Garden soil is usually too heavy and may have weed seeds and diseases. Used potting soil can be sterilized to avoid damping-off disease and reused. To sterilize, place soil in an ovenproof container in a 150 to180F oven for 30 minutes. Moisten the growing medium prior to planting your seeds, using room temperature, chlorine and salt free water for the best results. If you use city water, fill watering cans one to two days prior to let the chlorine dissipate. Softened water should be avoided. Moisten the media just enough so it is damp; you do not want to be able to squeeze a handful and have water drip. Fill the container, leaving space for the depth of the covered seed and water to collect on the surface. Lightly tamp the container to settle the soil by holding the container a few inches above a solid surface and dropping gently a couple of times.
Let’s Get Going!
Now you are ready to plant your seeds. Sow seeds to the required depth, and be sure to label the contents. There are a few things that can be done at this stage to help deter damping-off diseases. A top dressing of sand, vermiculite, clean aquarium gravel, chicken or turkey grit will help to keep the emerging seedlings drier. Cinnamon has a natural anti-fungal, antibacterial property and can be sprinkled over the growing media after sowing.
Maintain a moist but not wet environment until the seeds have germinated by covering the planted containers with clear plastic wrap, a pain of glass, etc. and water with a spray bottle to avoid disturbing the seeds. Most seeds will germinate at temperatures between 15 and 25 degrees C (60-75 F). Heat can be supplied by heat cables or plant starter heat pads placed below the seed trays, heating the soil and not the air. Once the seedlings have emerged, remove the cover allowing air to circulate and turn off the heat source if used. The ambient temperature can be reduced to 16 C. At higher temperatures the plants may bolt and elongate.
They’re up! What now?
To avoid and deter damping-off diseases, damage and knocking seedlings over, avoid watering from above. Water your seedlings from below by placing started containers in a water tight container, add water up to half the height of the seedling container, let sit for 5-10 minutes or until the media is moist again, then let drain. Watering with room temperature camomile tea or garlic water also may help deter damping-off as they are anti-fungal and antibacterial. Encourage ventilation around seedlings with a fan to mimic a breeze. This will not only help maintain a drier condition, another deterrent to damping-off, but also helps to strengthen the seedlings. If you don’t have a fan, gently brush over the tops of the plants every day with clean hands.
Good light is imperative for strong healthy seedlings. Plants become tall and spindly with insufficient light. Use a greenhouse, sunny window sill, artificial growing lights or cool fluorescent lights. Plants in a window sill will need to be rotated every day to prevent the plants from bending towards the light. Artificial or fluorescent light should be 5-10 cm (2-4”) above the seedling tops as this type of light is much weaker than natural sun light. Move the lights up as the plants grow. Set the timer for 14-18 hours of artificial light per day.
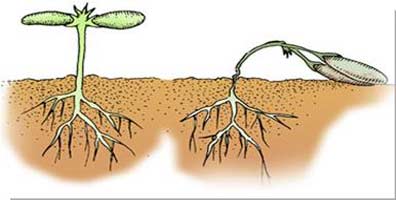
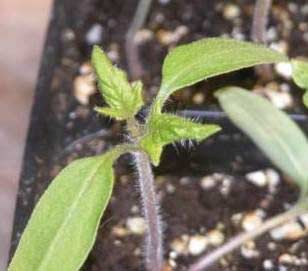
Seeds contain enough stored nutrient to germinate and for early growth. The cotyledons or seed leaves (two for dicotyledonous, one for monocotyledonous plants) and endosperm provide a source of food for growth. Seed leaves are usually rounded and do not resemble the true leaves. Start fertilizing when the first true leaves appear. Use a balanced fertilizer at half the recommended strength, every second watering or twice a week.
Weather’s getting warm!
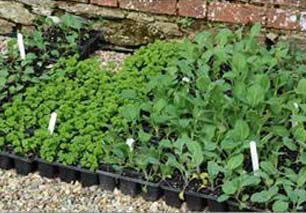
When you are a week away from placing plants in the ground, container, etc. start hardening off the plants. Seedlings need to slowly adapt to the outdoor environment before planting in the garden to prevent shock. The first day, place them outside in partial sun for 1 hour. The second day, place them outside for 2 hours. Increase the time the plants are outside by one hour each day. Continue this for at least a week and slowly move the plants into full sun or the required light. Yours plants are now ready for their new home.
The information given in this article is general. Seeds purchased through catalogues, supermarkets, nurseries, etc. will come with germination information on the packaging. If you have purchased or received seeds without cultural requirements, you will need to do some research to obtain the correct propagation information for that genus/variety. Starting your own plants from seed is rewarding, inexpensive and is a great activity for children. Have fun!
The fact that I can plant a seed and it becomes a flower, share a bit of knowledge and it becomes another’s, smile at someone and receive a smile in return, are to me continual spiritual exercises.
Leo Buscaglia
Prepared by Grey County Master Gardeners for use by home gardeners & community groups.
For other use, please email greycountymg@gmail.com March 15/2016 RB
Latest Blog Posts